For the vast majority of engineers, lead vocal is the most important part of the mix. Unless you’re dealing with an instrumental group, ensuring that the lead vocal can heard at all times is paramount. Background vocals can be equally important, because the musical interplay between lead and background or harmony vocals often define a musical arrangement. Here are techniques you can use to keep vocals in the spotlight of your mix.
Start at the Source
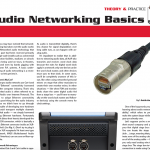
While it probably won’t be the most expensive item on the stage, the lead vocal microphone might be the most crucial piece of gear up there. No musician would ever choose an instrument without an audition, but it astonishes me how many singers walk up to a microphone without considering whether it’s the right mic for their voice. Some of the usual suspects for vocal use include the Shure SM58 and Beta 58, Sennheiser e835 and e935, Audix OM5 and OM6, Neumann KMS 104/105, AKG D5 and C 535, Audio-Technica AE-4100 and beyerdynamic M 69 TG.
These are all roadworthy microphones capable of producing excellent sound, however, that doesn’t mean they are the right mic for your singer. A microphone with a presence peak in the upper mids can help a dark male vocal cut through a busy mix, but may cause a female vocal to sound overly bright in a sparse mix. Encourage your lead singer to try a few different microphones, find one that complements their voice and buy it. Traveling with a vocal mic removes a variable from the equation, giving you consistency at front-of-house and comfort in the singer’s monitors. If something doesn’t sound right you can eliminate the vocal mic as the source of a problem. That can be particularly important for bands that don’t travel with production and are subject to PA du jour.
As far as dynamic versus condenser mics, the previous comments tend to hold true: choose the mic that complements a particular voice. Condenser mics tend to capture more detail and have an extended high-frequency response. This initially sounds like a good idea, yet on noisy stages, this can be a detriment, because it makes ambience, leakage from other instruments (particularly cymbals) and leakage from wedges more apparent in the lead vocal mic. These are not necessarily sounds that you want to emphasize every time you push up the lead vocal channel. Plus, you’ll have phase issues due to the timing difference between (for example) cymbals coming through the lead vocal mic versus cymbals coming through the overhead microphones. Sometimes a mic with limited high–frequency response can help you, minimizing ambient sounds while not giving a listener the impression that the singer sounds dull (no wisecracks please).
Big Three, Little Two
Microphone polar pattern is a characteristic that plays a critical role in any application. Many of us are already familiar with the basic patterns, the first three of which I call “The Big Three:” cardioid, figure eight and omni-directional. To these we can add hypercardioid and supercardioid, both of which have a crucial role on stage. Live sound engineers are not kind to the omni-directional pattern, because we think it’s a bad idea for a mic to be capturing sound from all directions on stage. We’re probably right, but bury two ideas in the back of your brain: (1) You can place an omni way closer to a source without creating proximity effect. Placing the mic closer enables you to turn down the gain, reducing the apparent amount of leakage from other sources. (2) When you need to mic a large group of singers on stage, the only way to get an accurate blend of their voices is with an omni. Using any other pattern will create hot spots by focusing only on certain singers. Having said that, omni-directional mics are rarely used on stage for lead vocal.
Cardioid, supercardioid and hypercardioid are most popular for lead vocal use, because they’re good at rejecting off-axis sound and reduce chances of feedback from loud stage monitors. In textbook terms, a cardioid mic is 6 dB down at 90° and zero at 180°. We don’t live in a textbook, so the reality is that due to variations in frequency and phase response, not all cardioid mics are created equal. Some may exhibit a “tighter” pattern, meaning that off-axis rejection is very strong. This is a dual-edged sword. On the one hand, it reduces bleed from the rest of the stage. On the other hand, if your vocalist has poor technique (i.e., does not stay on mic) you may hear variations in timbre as they move around the microphone. Hyper- and super-cardioid patterns have higher rejection on the sides (roughly 12 dB down at 90° for both) but have a pickup “lobe” directly behind the mic. The increased side rejection of hyper- and super-cardioid mics can make them poor choices for singers who don’t stay on top of the mic. You’ll also find that hyper-, super- and cardioid mics all produce proximity effect (sometimes quite pronounced), so you have to take into consideration your singer’s habits and vocal timbre when deciding if this is a plus or a minus. Strong proximity effect can be a plus for a male vocal where it adds weight in the lower mics, and a minus for female vocal for the same reason.
It’s Ten O’Clock. Do You Know Where Your Monitors Are?
The typical lead vocal arrangement consists of a microphone stand, a singer near the stand and a monitor (or two) blowing up off the deck at the singer’s ears. To avoid feedback, the monitor (or monitors) should be positioned in the null (or nulls) of the polar pattern.
If, for example, the microphone is cardioid, the maximum point of rejection is at “180°” — the rear of the microphone. That is where your monitor needs to be located.
A common mistake is to use a cardioid microphone and to place wedges at 10 and 2 o’clock. On the other hand, if the mic has a supercardioid pattern, the null points are approximately 120° and 240° off-axis. You don’t want a monitor facing the back of a supercardioid mic, because that pesky pickup “lobe” at 180° can hear the monitor and create feedback. The hypercardioid pattern has nulls at roughly 105° and 255° off-axis. Pointing the monitor (or monitors) at those null(s) provides more gain before feedback in the monitor (which makes your singer happy) and keeps leakage from the monitor out of the vocal mic (which makes you happy). See Fig. 1 and Fig. 2.
If your singer is using in-ears, you won’t have to worry much about feedback from their monitor mix, but you still have to worry about leakage. In fact, leakage from the rest of the stage is more pronounced when using ears. For that reason, a cardioid mic with less side rejection can be helpful because it helps reduce the feeling of isolation due to lack of room sound in the ears.
You Can Tuna Piano….
When you tune, or “ring out,” your monitors, problematic frequencies become apparent based upon the acoustic relationship between the mic and the monitor. Different mics will feed back at different frequencies with the same monitor. Your EQ must be tuned to compensate. In situations where multiple singers share a common monitor mix, it helps to use the same brand/model of mic for every singer, because trying to ring out one monitor simultaneously for different mics is a moving target. When you notch a graphic EQ at one frequency, it may cause an unfavorable change in the timbre of another mic. Or boosting a frequency that enhances clarity for one mic may cause another brand/model mic to feed back. On small club stages where an entire band is sharing two or three monitor mixes, using the same vocal mic for everyone can help make it easier to deal with feedback. (Whether you can get the band to agree on which mic may be more difficult).
Earlier, I mentioned the idea of carrying vocal mics for sonic consistency. An equally important reason to carry your own mics is hygiene. You don’t know where public mics have been, and using them is an invitation for colds and sore throats. (Plus, it’s just plain gross). Mic grills should be periodically removed and washed with soap and warm water, then dried over night. Between crew and band, it’d be a good idea to use something like Microphome (designed specifically for the purpose) or an alcohol disinfectant pad before each person uses the mic. In a pinch, you can wipe the grill with a baby wipe. You’ve already got those around for some of the band members.