
Don’t let multiband compression intimidate you. Here’s an explanation of how multiband compression works, and examples of how to use it.
If there’s one processor that just about every engineer uses for live shows, it’s the compressor. We compress everything (okay, almost everything. I don’t think I’ve ever compressed a high hat). Most of the time we’re using “full band” compression, meaning that the compressor is acting on the entire frequency spectrum of the signal. Depending upon how the controls have been set, this can sometimes be akin to simply turning down the fader on the channel you’re processing.
There can be problems with full band compression, the classic example being what happens to a mix with a significant amount of kick drum when you’re compressing the L/R mix bus (dance music, for example): Every time the kick drum hits, it triggers the compressor, causing other sounds (such as vocals or percussion) to pump up and down — even if those sounds aren’t contributing a lot of energy to the mix.
A multiband compressor has a built-in crossover that splits the audio signal into several different frequency bands, the same way we use crossovers to route different frequency ranges to different transducers in a loudspeaker. Multiband compressors can have anywhere from three to six bands, though more than three or four may be asking for trouble. After the separate frequency bands have been compressed, they’re mixed back together into a full-bandwidth signal.
Each band of a multiband compressor provides controls similar to those you’d find on a “normal” compressor, such as threshold, ratio, attack, and release, but you’ll also find controls for the crossover points between frequency bands as well as level or make-up gain for each band — but beware of getting carried away with the make-up gain or you might overload the next part of the signal chain.
Do You Really Know What All Those Knobs Do?
When you’re first trying a multiband compressor on a channel, start with all of the threshold controls set high enough so that none of the bands are compressing, and the ratio or range (if applicable) set to the minimum value (range sets the maximum amount of gain reduction). Then, eyeball the way the frequency bands are set up, and solo each band or crank the gain for each band (one at a time) until you hear the region of the sound that you want to target. This tuning process is similar to using a parametric EQ to find a problematic frequency: crank the gain of a band so you can clearly hear it, sweep the frequency until you find what you’re looking for, then cut the offending frequency.
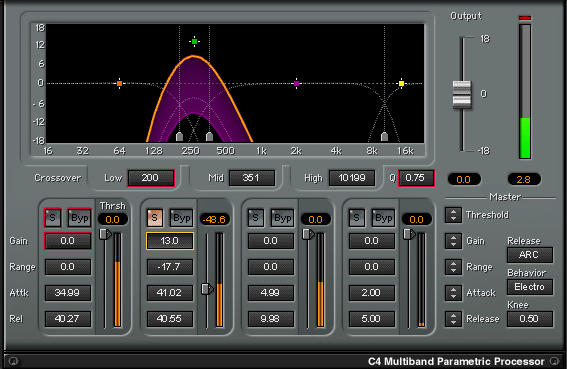
When you find that band, zero in on the region you want to compress by narrowing the bandwidth and adjusting the crossover points. In Fig. 1, we’re listening for the boxiness that can plague kick drums in the lower-mids, so we can target that region for compression. We’ll use the Waves C4 Multiband Compressor for the examples, but other multiband compressors can yield similar results.
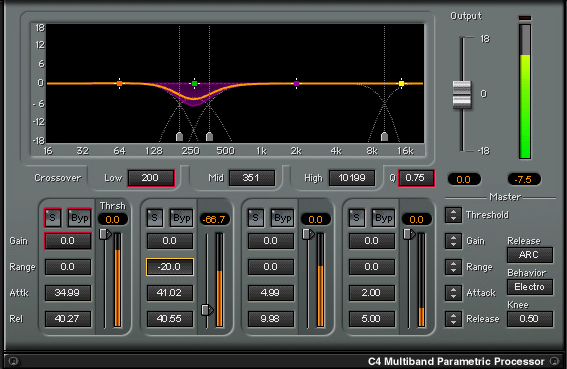
When you’ve found the offending area, pull down the threshold and increase the range to get the desired amount of compression. Fig. 2 shows compression in the boxy region of the kick drum, while leaving the rest of the kick’s frequency range unchanged. You can then add full-band compression using the Master controls, or by adding another compressor in series with the multiband compressor.
A quick side note: I always gate first and then compress. If you compress before gating, you’ll have trouble finding that sweet spot for the gate threshold where you can gate out the noise but not the quiet hits on the kick.
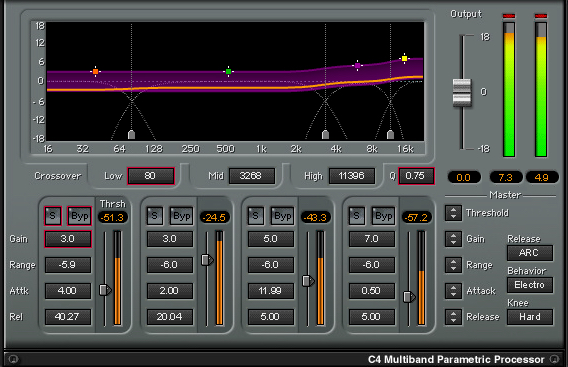
Fig. 3 shows suggested crossover points for a mix with a vocal, where we want to compress the bottom end, but allow the top end to ‘breathe.” The kick no longer triggers compression on the entire signal; we’re also giving the high-mid and high bands a “lift” (right side of the graph) to increase vocal presence and airiness in the mix.
Try to avoid setting crossover points in the middle of the vocal range because the human ear is sensitive to vocal sounds, and it may sound unnatural. Notice that the low-mid band in this example runs from 80 Hz to appx 3.2 kHz, putting the low crossover point well below the vocal range, and the mid crossover point above the frequency range where vocal fundamentals live.
Achoo!
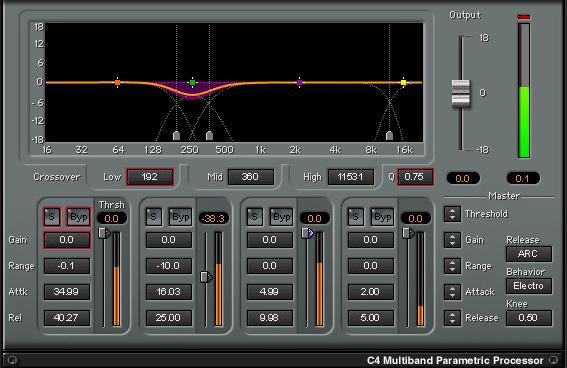
Multiband compression can help on lead vocal channels when you want to minimize a particular frequency range. Let’s say your singer sounds like they have a cold (maybe they do!). Fig. 4 shows a C4 set to compress in the frequency range between 192 and 360 Hz while leaving the rest of the signal untouched, which pushes down some of the lower midrange frequencies.
You can then follow up with some compression on the Master to smooth out the overall level.
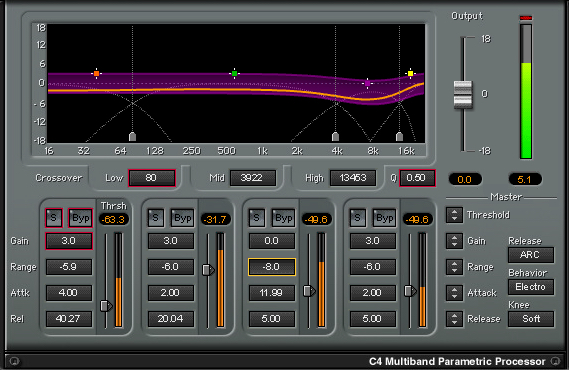
If you’re dealing with a P.A. system that sounds harsh in the upper-mids of the vocal range, multiband compression can tame the harshness. Fig. 5 shows a vocal channel with some extra compression in the frequency range from approximately 3.9 kHz to 13.4 kHz, which smooths out the aggressiveness of a HF horn.
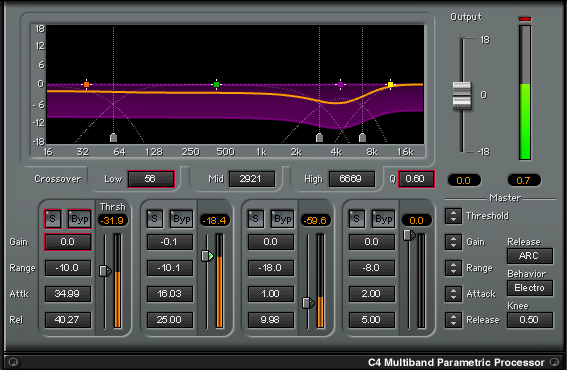
The final example in Fig. 6 shows how you can reduce buzz or excessive finger noise from a bass. This time we’re compressing the entire frequency range with some extra gain reduction in the region between approximately 2.9 kHz and 6.6 kHz.
Notice the dip in the upper-mids, where the extra compression quiets down those finger noises and fret buzz.
Keep in mind that multiband compressors generally enable you to compress a sound more severely than using a full-band compressor, so initially keep the thresholds high and the ratios low to avoid compressing the life out of the source. You can always dial in more compression as you go.
Steve “Woody” La Cerra is the tour manager and Front of House engineer for Blue Öyster Cult, and Jon Anderson & The Band Geeks. He can be reached via email at [email protected].


